How to Buy a Domain Name Through Google
Buy a Domain Name through Google has many benefits,free access to other Google Apps, and the option to keep your contact information private from users who want to learn more about you as the domain owner: including the option to auto-renew your domain annually. Google itself does not currently host domain names, but has partnered with Multiple Domain Registrars to give you the ability to buy a domain through Google. Read the Following 17 steps outlined in this article to learn more about the process for Buy a Domain Name through Google .
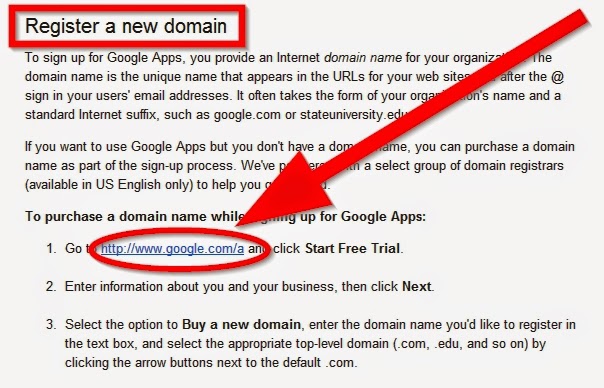
Step 1.Go to the "Google Support" website provided to you in the Sources section .


Step 4.Click on the button labeled "Find domain" on the far right side of the landing page. The page will refresh and give you the option to enter a name for the domain you want to Buy.

Step 5.Enter the domain name you want to Buy into the blank field provided.


If the domain name and domain type are not available for Buy , try changing the domain name, the domain type, or both, and check again for availability. If the domain is available, you will be prompted to enter new Google Apps account information.

Step 8.Buy a Domain Name Through Google Step 8.jpg Enter a new username and password below the section labeled "Create your new Google Apps login."
The username and password you enter will be used to manage your domain and Google Apps account after purchasing your domain.

You will be prompted to enter your contact information, and to specify the size of your organization.


Step 15.Verify that your billing information is correct, then click on "Continue."
Step 16.Choose your payment type and enter your payment information into the fields provided. You will have the option to pay with a bank account, or a credit card.
Step 17.Click on "Submit and activate my account" after you have entered your payment information. Google Apps will then send you an email confirmation that provides you with details about your new domain, as well as information about how to access and manage your new domain.
No comments: